
How do you create a channel on YouTube? That is the question…
Did you know there are over 40,000 Google searches every second? Now, think about it… isn’t that a great reason to want to capitalize on that with videos from your own channel? In some ways, creating videos, especially in this day and age, can be easier than writing a blog post, so we should hop to it and start building your channel, shouldn’t we? But, then, you are here because you already decided that, right?!
So you want to be a YouTuber, huh? Well, strap in because starting a YouTube channel is an exciting rollercoaster ride! From picking your first video topic to growing an engaged audience, this guide’s got your back. We’ll walk through step-by-step how to set up your channel, brand it, and start engaging viewers. You’ll learn insider tips to help your channel stand out in the crowded YouTube-verse. And, remember, YouTube is where you want to be with those Google searches since Google owns YouTube! Whether you want to share your art, spread knowledge, or just tell stories, this article will give you the keys to YouTube success. Your journey to becoming an influencer starts right here!
Setting the Stage: The YouTube Channel
To get started on YouTube, you’ll first need to create a Google account. You can also use a Google account that you already have if you have one, which many of us do. 🙂 Once you’ve signed in, click the “Create a new channel” button to set up your YouTube channel.
Choosing a Channel Name
Pick a name that represents your brand or content focus. Make it catchy yet simple, and check that the URL is available. You can always change it later, but choose wisely, as your channel name creates your first impression.

Customizing Your Channel Art
Your Channel Art, including your profile photo and channel art banner, gives viewers a sneak peek into what your channel is all about as soon as they see it. Select an eye-catching banner that represents your content theme or personal brand. Use it to introduce yourself, share your channel’s mission, and build your credibility. For your profile photo, choose a friendly, close-up picture of yourself if possible. Or, use your logo.
Interestingly, I have often received flack when I choose my logo image (the “redhead”) for my profile pic, but that IS me. It is my brand. And, it was actually a painting commissioned in my honor, based on a photo of me, painted by a well-respected artist in California. So, there is always the preferred (e.g., of photo of yourself), but as with what I did, in my case, know when to break the rules and be YOU! 😀
And, you will notice that I used the “redhead” for the profile pic, but I did use a couple of photos of me in the Channel Art banner. Though, it could use some updating LOL. So, again, don’t do it just to break the rules, but do it when that is who YOU are and you do YOU!
BTW, if you’d like some help with your channel art, you can get some awesome YouTube Channel Art templates via Canva. Check them out there. I believe there are quite a few that are free and of course, if you have a premium Canva account, even more are available, via the cool, premium templates.
Setting Channel Settings
Head to your channel settings to choose a content rating, video privacy settings, and more. Decide if you want to disable likes/dislikes and comments or filter spam on your channel. Connecting your YouTube channel to Google AdSense is another way to help monetize your content.
Defining Your YouTube Strategy
Think about your goals and the type of content you want to share before posting your first video. Who is your target audience? What value can you provide to viewers? Determine a content schedule that is sustainable for you. And when I say sustainable, I have learned from experience that you don’t want to pack it into every minute possible. Make sure you allow for buffers, vacations, the “I don’t feel like working” moments because you have been working 30 days straight and only slept two hours a night. If you are that type of person, build in another 10-20% buffer when we say “sustainable.”
Now, let’s start with a trailer or channel intro video to give new viewers an overview of what to expect from your channel. Sometimes that can be as simple as grabbing your smart phone, especially the iPhone (I can’t help, it I am a fan girl 🙂 )… Grabbing the iPhone and point it to your face and just start talking. Don’t worry, just be you! The audience is going to fall in love with you… this is YOUR channel. Let them know (briefly) WHO you are and WHAT you will be providing to them in you YouTube channel.
Remember, you can always replace this trailer. Nothing is final. We are just getting things set up and started. I mean, nothing is really permanent on the internet.
With the fundamentals set up, you’re ready to start creating content for your YouTube channel! Keep optimizing and improving as you go, to build your audience, and work toward achieving those goals of yours on this wonderful platform! Consistency and quality are key—so take your time and have fun with it!
You want to take time (quality) but you don’t want to take so much time that you procrastinate (been there!). Make sense? Ok. Great. Let’s keep going.
Your YouTube Channel Content
With your YouTube channel, you need content. It is important that you understand what content you are presenting. You need a plan.
Choosing Your Content Niche
One of the first things you will want to do is think about your niche. You don’t want to skip this step. Oh, it is tempting. Believe me, I have tried, and you will regret it. So, grab your favorite drink, find a comfortable spot, and sit down, and let’s determine what focus you want for your content, ok? Believe me, this is the correct starting spot for your YouTube channel to have any chance at being a success!
Some questions you may want to ask yourself would be, >> Do you have a hobby or skill you want to share with the world? Are you passionate about a particular topic or subject matter? Finding your content niche is key.
Once you’ve identified your area of expertise or interest, develop a content strategy. Think about what kinds of videos you want to create, how often you’ll upload new content, and how you’ll keep viewers engaged. The options are endless—you can do product reviews, tutorials, unboxing videos, reactions, comedy sketches, and more. Just make sure you have enough material to keep posting on a regular schedule.
Also, if you pick a certain type of video, that doesn’t mean that you are forbidden from doing one of the other types of videos. It is ok to have a playlist that includes, say, unboxing videos, for those times that you want to share the experience with the world, while you unbox your next studio gadget that you got from Amazon. That is fine! What we are defining here is the MAIN content that you will be covering. But, remember, this is about you and it should still be fun and stress-free, ok?
Developing Your Content Plan (aka the WHOLE Enchilada)
To build your YouTube channel, you need to have a consistent content-uploading schedule to keep your viewers engaged. A good rule of thumb is to post at least one new video a week, but some of the most successful YouTubers post three or more times a week. Figure out what pace works for your niche and stick to it.

I used to try to do it daily but that can make you crazy, believe me! Also, there are a lot of steps that go into successful YouTube videos. It isn’t just an upload and leave it there. Although, that is ok when you are starting. When we reference the successful YouTubers, we are talking about those who research the keywords, do the Thumbnails, the transcripts/captions, the end cards, the whole works, or whole enchilada, so to speak. And, what I found to be helpful is to spread that out throughout the week. So, every day, I am working on one component of each of my videos, but there is a particular day where my videos are scheduled to go live. Then, I sort of gamify with myself to see if I can beat my timing and finish it earlier the next week (though it is still scheduled for the same time, to go live). That is just a little thing I do for myself, to keep it fun.
My point is, if you try to do a week’s worth of work into one day, you may lose your mind! So, slow it down. If you can only do one per month, to start, that is perfectly fine! Cut yourself some slack and have fun!
By the way, if you are looking on my channel for that once a week, I do work for clients and was referring to client work and commitments 😉 And, I do quality work and never miss those commitments!
Now, you should also organize your ideas ahead of time and create an editorial calendar to map out your upload schedule. Come up with a list of at least 10-20 video ideas to get started. Then schedule out when and how often you’ll release each video. Having a plan in place will make the content creation process much smoother.
I personally use FileMaker Pro, but I probably would not recommend it because it is an entirely other conversation to train someone how to use it for that purpose. Though it practically runs my life and makes it super simple (automated), but I am also a developer (contact me if you want an application like that developed for you, but know, upfront, it is not cheap). So, for most people, I recommend using Microsoft Excel, if you are a spreadsheet person (or Google Sheets), or using Trello (which I also use) and which can be shared with your team. Another option is to use a calendar, like Google Calendar (which can also be shared with your team, along with Google Sheets).
Creating Your Videos
Now for the fun part… Filming and editing your videos! You will want to invest in a quality camera, microphone, and editing software to produce the highest quality, best content possible. For the focus on viral videos, keep your videos under 10 minutes in length and focus on one main topic or theme per video. Be authentic and enthusiastic, and provide value to your viewers.
You can also make long-form videos that are more like documentary in length (e.g., 60 minutes), but I have personally found that people lose interest in watching them after 30 minutes. You are generally pushing it after 20 minutes. Sure, there are some “old timers” who will disagree with me and insist on the longer videos, but I usually aim for the shorter videos if I am just going for viral effects and go for the 20-minute length for what would be called “long form” videos. So, even if I record 30+ minutes, I cut them down in length as much as possible or make separate videos and clips out of them. Some of my older videos do not necessarily follow that rule, but then, people used to watch longer videos decades ago 🙂
Engage your audience. Yes, you can do this via video. Be expressive. Look into the camera. This eye contact will be felt by your viewers, your audience. Also, use hand gestures (not too many, but enough to keep that variety and engagement). Other tips include changing your tone and smiling. Speak clearly and with confidence. Keep things concise while thoroughly explaining your topic.
Pro Tip: Use something like Plexicam products to help keep the camera right in front of you, even on a laptop, so that you truly ARE looking straight into the camera!

This is a “must have” if you want to ensure that you appear to have eye contact with your people.
We know that that is the intention, right? But, while you have perfect eye contact with the person you are talking to, the camera goes without any attention. It is plastic and metal, or part of your laptop and that is NOT what you are looking at, is it?
So, when the video is shot, your eyes are on the person (or people), and that is as it should be, but the viewer of the recorded video feels like you are NOT looking at them and so it seems impersonal.
How do you fix that? You set up the camera so that it is right in front of you. It is now right over where the person is on your screen.
How do you do that? With plastic that has been set up specifically to fit your desktop computer, your laptop, or anything you can throw at them (not literally, but that would work, too).
So, go visit the PlexiCam people and get the setup that you need. We did. We bought about three kits from them, and we are ready to go with any setup, studio or on the road 😉 ).
Also, remember: Viewers appreciate videos that are well-produced, high-quality, and get straight to the point.
Bonus: Creating Your Virtual Videos
Not ALL of your videos have to involve people. They do not even have to include YOU! This is especially helpful if you are camera shy, or even people-shy. Granted, it is easier if you are at ease in front of a camera because you will have more options available to you, but, don’t let this limit you from starting your YouTube Channel.
Some people think that the solution is to steal other people’s content (e.g., videos) and post them on their channel, with that mantra that everything on the internet is free. Obviously, that is not the case and just because you have access to it does not mean it is yours. Just because your neighbors car is in his driveway and you may have access to drive it away, does that mean it is yours to take? Yeah, that is my point.
But, see, you don’t have to sink to that level because you have other options!
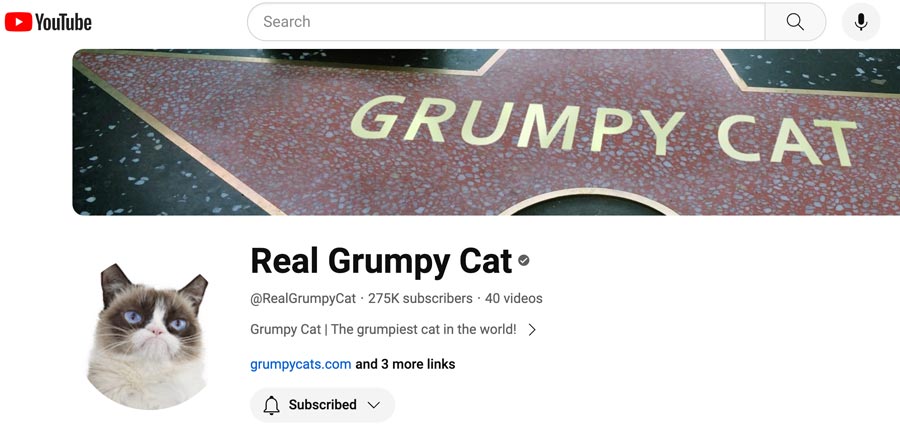
First off, if you have a pet, you can film your pet. People LOVE videos with animals. People have made decent incomes off of pet videos! For example, “Grumpy Cat” comes to mind. Not only was this creature a family pet, but became a celebrity in her own right and made a lot of money for her owners! Check out grumpycats.com and the YouTube channel!
Other options include the boom with AI and creating videos without people. There are so many software programs available to you. Here are a few of them to get you going. And, stay tuned because I will be posting demos of these tools here, on my YouTube channel, and in the community at SocialCafe.net.
Helpful AI Tools (incl. Podcast & YouTube) …
Some of the above links are affiliate links and we may benefit financially from your clicks, for which we deeply thank you 🙂
The YouTube Studio: Options and Set-Up
Now it’s time to set up your studio. The good news is, you have options. You can keep it simple with basic equipment or go all-out for a professional setup. It depends on your budget and how serious you want to get. Before we start, here is a link to our recommended equipment and software. I won’t lie, there are some high-priced items on that list. The high-priced items are those that we use in OUR studio. But, I have also included some lower-priced items, some of which are NOT in our studio (because we are using the pro equipment), but which have been used by associates and which have come highly recommended and which we have often witnessed by way of video editing (e.g. a microphone that one of our associates uses in a recording session where we do the post-production work and can verify that it was a quality recording).
That link again >> Video Resources (those mentioned in this article)
A Simple “Studio”
If you are just starting out and trying to keep costs down (or as low as possible), you can create a simple studio with equipment you already own. You can do it with a SmartPhone with a decent camera to get started. Find a quiet space, set up your phone on a tripod or stack of books, and you’re good to go. But, honestly, the professional in me recommends that as soon as possible, move toward a bit higher quality, if possible. That said, even in using the iPhone, make sure you have good lighting, like natural light from a window. This barebones setup works fine for vlogging, tutorials, or other casual content. The more professional content will need a more professional, dedicated space.
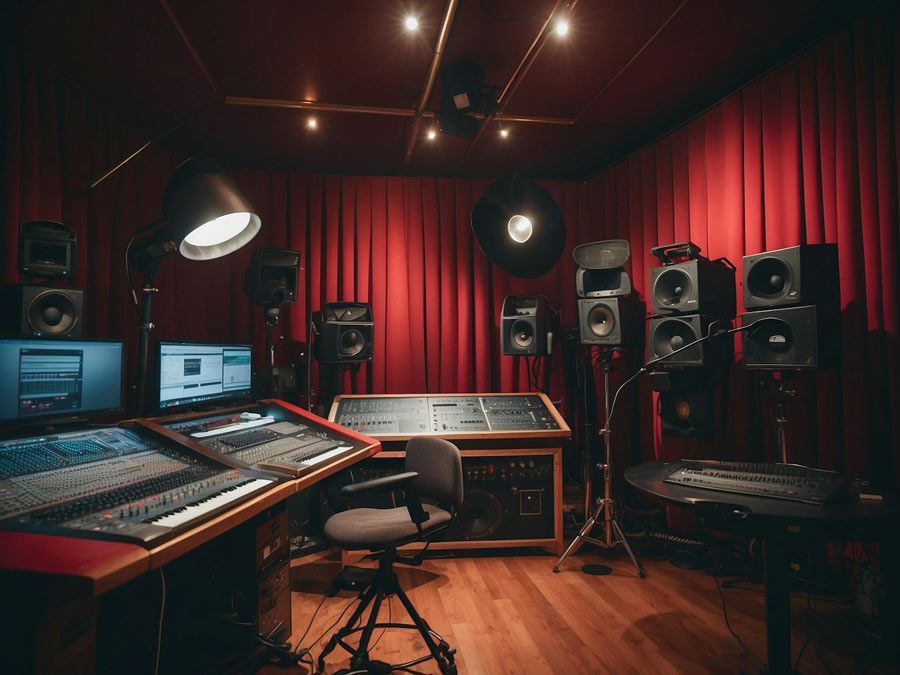
A Dedicated Space
For a more professional result, set aside a dedicated space for filming, like an extra bedroom or office. That is what we did, from the very beginning, but then both my husband and I are professional sound engineers and musicians, with decades of experience, so we have had a studio for over three decades, even with the kids around and they grew up know what a studio was!
You will want to get key equipment like:
- A quality camera: A DSLR, mirrorless, or camcorder camera is a desirable addition. Why? It renders a higher quality video than a phone any day (no matter what any “would-be expert” will say (take from us, true experts!). Look for 1080p HD video capability or better;
- Microphone: Invest in an external mic to capture high-quality audio. A USB mic, like those shown on our Video Resources page will work. You can also use pro mics (also shown) along with the right adapter. That is how WE do it, so that we ensure the absolute highest quality. For XSpace, you can use a Lavalier mic, but make sure it is a high enough quality microphone ($800). Though many people recommend them, in many cases, they are actually WORSE than just using the built-in microphone on the iPhone. Also, whatever you do, do NOT use Apple AirPods! They are great for phone calls but they cut in and out and are not suitable for a high-quality recording! Also, it is advisable to NOT use a headset because if you are not aiming perfectly into the microphone, you will not have a high-quality recording, but it IS doable if you are extremely careful and you have a high-enough quality headset.
- Lighting: We recommend the three-point lighting system to ensure that you do not have any shadows. (I should add the image of that to this article!). If you are using an iPhone, be sure to get a ring light. But if you are setting up your dedicated space, which is what we are discussing here, you will want a couple of softbox lights (also shown on the Video Resources page. This is to give the soft lighting that you need, balancing the overall space while brightening your face. Three-point lighting with a key light, fill light, and backlight is the key setup.
- Backdrop: A colored backdrop, green screen, or wall mural provides an interesting background. Make sure it’s wrinkle-free. A handheld steamer is helpful to have on hand to get rid of those wrinkles (and you can also use it for your wardrobe, as a “touch up” if needed before going on camera 🙂 … back not while you are wearing the clothes… for safety reasons!).
- Tripod: A sturdy tripod keeps your camera steady for the best footage. You want a tripod that is able to support the weight of your camera without bending or tipping.
- Editing software: You can use free editing tools like iMovie or Windows Movie Maker to polish your footage. For more advanced editing, try Adobe Premiere Pro or Apple Final Cut Pro. Those two are my personal favorites and I use them both. Camtasia is also a nice one and works well for tutorial-type videos with the mouse tracking, etc. There are also some other cool video software programs that have specialized features for specific purposes, but for the traditional post-production video editing, I usually turn to Adobe Premiere Pro and Apple Final Cut Pro.
With the right equipment and setup (and I really cannot stress enough that you will want to refer to our listing of equipment on our Video Resources Page), you’ll be creating high-quality YouTube videos in no time. Start with a simple studio; then you can build up from there as your skills and audience grow. The most important thing is just to start filming. You can always improve as you go! Keep at it, and soon you’ll have a YouTube channel you can be proud of and ready to share with the world!
Getting “Seen” >> Getting to the Top with SEO and SMM
Once your channel is set up and you have some content uploaded, it’s time to start promoting it to gain more views and subscribers. The two most effective ways to do this are search engine optimization (SEO) and social media marketing (SMM).
Optimizing for Search Engines
SEO stands for “search engine optimization” (and, when referring to a person, “search engine optimizer,” but is generally the act, and the person is the “SEO Specialist” etc.). So, when we participate in the act of SEO as it relates to our video content, we are optimizing it so that it ranks higher in search engines like Google. The higher your ranking, the more people will find your channel. Some key things you can do to help your channel, and its content do well, include:
- Choosing good keywords and phrases in your video titles, descriptions, and tags. Think about what terms people would search for to find your content. Use a free keyword research tool to find popular search terms in your niche.
- Placing important keywords in the first 1-2 sentences of your video descriptions. This signals to Google what your video is about and will help. Also, I recommend using an AI tool to help with the video description. Scroll up in this article to find the AI tool listing and quite a few of those can help. 😀 Magai is a favorite.
- Use keywords in your video tags, but don’t go overboard. Aim for 10-15 tags per video. What really helps me with keywords and what I could NOT do without, is TubeBuddy! I am an affiliate but I would recommend it either way!
- Engaging viewers by liking and replying to their comments. Activity and engagement are signals to search engines that your content is valuable.
- Optimizing your channel for SEO by including important keywords in your channel description, channel tags, and channel keywords. Again, TubeBuddy can help here.
Harnessing the Power of Social Media
Social media platforms like Facebook, Instagram, and X.com are powerful for promoting your YouTube channel. Some tips for effective SMM include:
- Posting your new videos on social media as soon as they go live on YouTube. Cross-promoting will expose your content to new audiences.
- Engaging with viewers who comment on your social posts. Like and reply to their comments just as you do on YouTube.
- Using hashtags as hashtags helps to make your content more discoverable. Research your niche to identify the most popular hashtags. Include a few hashtags in each social post. Social media posting tools such as Publer help to automatically suggest not only hashtags but Publer does the research for you and suggests the most popular hashtags, saving you time as you post to YouTube or post your YouTube video to other sites!
- Tagging collaborators or influencers in your niche. If you work together, ask them to share your video on their social channels, too. Collaboration and cross-promotion are key.
- Posting regular updates, behind-the-scenes content, and channel news on social platforms to stay connected with your viewers between video uploads.
- Driving social traffic to your YouTube channel by including links in all your posts and channel profiles. The more people visit from social media, the better for your search ranking and views.
With regular SEO and social media optimization, your YouTube channel will start gaining more visibility and rise in the search rankings over time. The key is consistency, so keep promoting your content on all platforms to build your audience and get discovered.

YouTube Channel FAQs: Answering Common Questions
Have some burning questions about starting your own YouTube channel? We’ve got you covered. Here are answers to some of the most frequently asked questions from new YouTubers.
Do I need any special equipment to get started?
To create a YouTube channel, you really only need a few basic tools:
- A Google account in order to sign up for YouTube and if you do not already have that, you can easily sign up and obtain one. Most people have those.
- A computer or mobile device that has a built-in camera or access to have a camera attached for recording and uploading video content. These days, with laptops having built-in cameras, that is much more accessible. And, mobile devices, too, with built-in video capability.
- Video editing software. Even though we talked about the premium options above, there are many free options available. A couple are listed above, but there are many more, too.
- As we mentioned above, you can “graduate” to an external microphone, lighting kit, video camera, etc. depending on your content and your financial resources.
The good news is you probably already have everything you need to get started. You can always upgrade your equipment over time as your channel grows.
How do I come up with content ideas?
Being able to keep the flow of creativity with a steady stream of content ideas is crucial to success when it comes to a YouTube Channel. Here are some tips to help with that process and get your creative juices flowing and keep them flowing:
- Focus on your interests and passions. Create content around topics you know and love.
- Pay attention to trending topics as well as current events in your niche. Put your own spin on what’s popular.
- Look for questions people frequently ask about your area of expertise. Turn those questions into video topics.
- Check out what types of content your target audience currently enjoys watching. Provide more of the same, or create something new and different.
- Don’t be afraid to get personal. Share details about your life, experiences, opinions, and stories. Viewers will connect with your authenticity. The more you practice, the easier it will get. Stay consistent, and keep an ongoing list of new content ideas to draw from as you continue.
You can track your ideas in a tool like Trello.
How often should I upload new videos?
There is no “right” answer to this, but in general, aim for at least one new video per week when you’re first starting out, in the beginning. I wrote about “overdoing it” above, but some tips for developing an upload schedule include and can be summarized by the following:
- Consider how much time you have to devote to your channel. If you can only commit to a few hours a week, start with a less frequent schedule. You can always increase it later.
- Find a pace that is sustainable for you long-term. It’s better to be consistent with a lighter schedule than burn out trying to do too much too soon.
- Study the upload schedules of YouTubers in your niche with similar content. Their cadence can provide guidance for what viewers expect.
- Let your audience know your intended upload schedule so they know when to expect new content from you. Stick to that schedule as much as possible to build trust.
- Don’t be afraid to experiment. You can always adjust your schedule up or down based on how it’s working for you and your growth.
The key is really just to start. You can optimize and improve your process over time through trial and error. Stay committed, keep practicing your craft, and remember – the journey of creating content is just as important as the final product. Have fun experimenting and connecting with viewers along the way!

To get started, pick a video topic related to one of your interests or passions. Write a simple outline, gather any materials you’ll need, and press record. Don’t worry if your first few videos aren’t perfect. Focus on capturing your authentic voice and personality. The more you practice, the more comfortable you’ll become in front of the camera.
Once you’ve uploaded a video, share it with your friends and family to gain some initial feedback. Ask them what they enjoyed most about the video and what they think you could improve for next time. Incorporate their suggestions into your next upload.
Above all, remain consistent. Aim for at least one video per week, even if they’re shorter at first. Viewers will appreciate your commitment and reliability, building trust that you’re someone worth watching regularly.
You’ve got this! Keep learning, stay positive, and have fun on your YouTube journey. I’m excited to see where your channel goes from here.
Is it free to create a channel on YouTube?
As a matter of fact, it is — it is completely free to create a new YouTube channel. All you need is a YouTube account and you can start customizing your channel banner, profile picture, and other details for free. Once you create your channel, you can add links, playlists, and basic info to the channel page at the top of your channel.
It’s time to make a new YouTube channel if you haven’t already. Make sure you have a YouTube account or a Google brand account to start. You can also use the YouTube app to create a channel using your mobile device. Don’t forget to customize your channel banner, profile picture, and video watermark to make your channel stand out amongst all the competitors. Once your channel is set up, you can start posting that YouTube content we talked about and use YouTube analytics to track your channel’s performance. Consider creating a channel trailer and YouTube shorts to engage with your audience. That is your next step 🙂
How do I create another channel on YouTube?
What we have discovered is that creating a YouTube channel for beginners is easy and free with YouTube. If you don’t already have a Google account, you can simply create one to get started. Once you have your Google account set up, go to YouTube and click on the top right channel icon. From there, you can select the option to create a new channel. YouTube gives you everything you need to know to customize your channel, from optimizing your channel to creating a banner image that will appear on your channel page. You can even grow your YouTube channel and potentially make money through the YouTube Partner Program. By turning your channel into a brand account, you can access new features and enhance your YouTube marketing strategy.
That is what I have done in all cases, is turn my account into a Brand Account. And, yes, going through the steps to create another YouTube channel are very similar to what you just did in this step-by-step.
How do you start a YouTube channel for the first time?
Creating a YouTube account is easy and completely free. Simply go to the YouTube homepage and click on the “Sign In” button in the top right-hand corner. From there, you can create a new Google account or use an account that you already have. Once you’re signed in, click on your profile picture in the top right-hand corner. Once you have done that, select “Your Channel” and start working on the customization of your channel. One of the first steps is clicking on that profile picture and adding a profile picture, then the banner (sized at 2048 x 1152) and a description to make it stand out in search. YouTube recommends setting your channel to a brand account if you plan on making money on YouTube. I definitely agree with them on this! This will also allow you to collaborate with others easily and keep your social media strategy organized.
After you have worked through these steps, you can work on the fun part >> building your content and have the chance to make it big on YouTube! Remember to make a new Google account if you want to create a new one for your business or another name. Keep working on your content and also keep focused on engaging your audience and interacting with your audience (which are actually two different but related, activities). This will aid you if one of your goals is to make money on YouTube. You can do this!
Why can’t I create a YouTube channel?
YouTube is free and this makes it a great platform for marketing and for sharing videos with the world, but sometimes creating a YouTube channel can be a bit tricky. When you go to create a YouTube channel, make sure to customize your channel to make it stand out. Add a profile picture and banner that represents your style or content. But remember, YouTube may have certain requirements for things like the banner size – make sure it’s at least 2048 x 1152 px for optimal display. When choosing a new channel name, pick something that’s catchy and easy to remember, as it can get you more views in the long run. Keep an eye on the notifications in the bottom right corner of the screen for any important updates or messages. If you do not follow the instructions that YouTube gives you, it may interrupt you process of creating a channel. Simply take a deep breath, open a new tab in your browser, start over, read each instruction that YouTube presents and follow it to a “T.” You should be able to go through the steps and create your YouTube channel.
Conclusion
You now have all the tools you need to start your YouTube journey off right. Don’t be afraid to jump in and begin creating. The most important thing is to stay true to your creative vision. Don’t get discouraged if you don’t gain an audience right away. Stick with it, keep improving your content and your channel will grow over time. The opportunities are endless if you put in the effort. So grab your camera, brainstorm some video ideas, and start uploading. You’ve got this! Before you know it, you’ll have a thriving channel with tons of engaged subscribers. Just remember to have fun with it. Now get out there and start creating your first YouTube video. Your audience is waiting!
Comments on this entry are closed.
Thank you for your article, it’s very helpful and useful.
game
Thank you, Athena. I am glad you found the YouTube article helpful. -Deborah
thank you for your article
You are welcome, Angel. I hope that you found it helpful. (De nada, Ángel. Espero que te haya resultado útil. Noté, en tu enlace de YouTube, que estás hablando de negocios rentables. ¿Has visto la útil herramienta en https://sw.bcafe.co/youLyrn? Estoy preparando un vídeo tutorial sobre eso ahora mismo.) -Deborah
Wow, Deborah! What an excellent, comprehensive article about creating a YouTube channel. As you know, I am a HUGE lover of AI video tools and not being in front of a camera 🙂
Thank you so much, Julie! I appreciate your feedback 😉
Oh, I didn’t realize I would fall in love like that, to that degree, with AI video tools! I was basically “anti-AI” but then I found that it is a matter of understanding AI and like many things, if you abuse it, that is not cool, but there are many benefits to using it correctly.
And, yes, with the “not being in front of a camera.” It is like a mission… To find and utilize AI tools that help with that endeavor. Maybe that should be the series for awhile in our Thursday XSpace w/Gail… “AI Tools – When You Do NOT Want To Be On Camera.”
Thank you so much for the detailed write-up. It is indeed very informative and useful.
It is so helpful to me and I believe it benefit a lot of others as well.
Keep up with the good work and love you.
I am glad that you found this helpful! Please do visit us again 😉 -Deborah
Hi there! I appreciate you giving these great pointers and advice on how to launch a YouTube channel. I’ve been considering entering the YouTube realm for some time now, and your advice has given me the courage to start.
Regarding discovering your niche, I completely concur with you. Making content around something you’re passionate about is crucial since it not only makes the process more fun but also helps your audience relate to you.
I’m glad you found this helpful, Dwarka! Yes, on the niche, sometimes it is tempting to head for what seems profitable, especially if we feel panicked to do so or stressed by external factors but ultimately, passion is what drives and that, I think, is where our success lies. It is like an internal success key that our psyche is trying to tell us 😉 Thank you, I concur with what you are saying! I appreciate your input 😉 -Deborah